
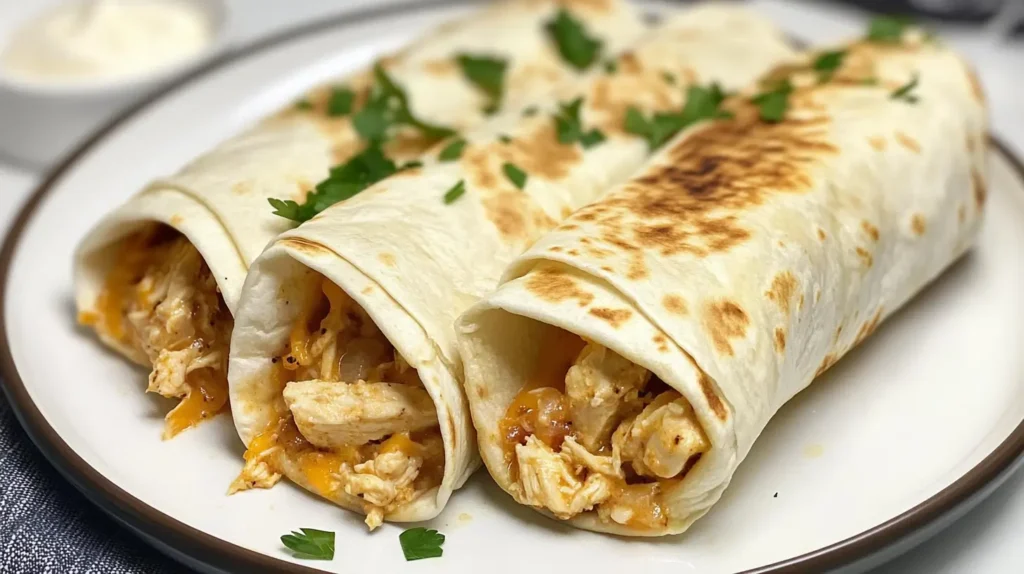
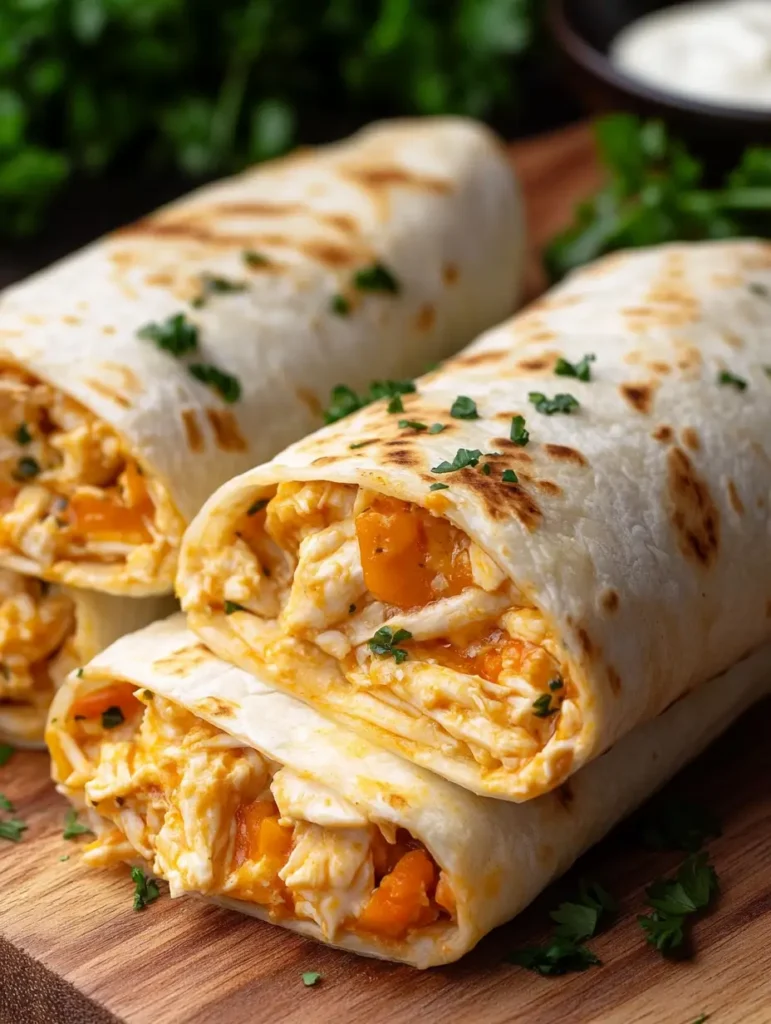
Sinking your teeth into a warm, crispy wrap filled with tender chicken, gooey melted cheese, and a burst of garlic flavor all ready in under 20 minutes! These Cheesy Garlic Chicken Wraps are the ultimate solution for busy weeknights or a satisfying lunch that everyone will love. I first whipped these up on a hectic evening when I needed something fast yet delicious, and they’ve been a family favorite ever since. What makes this recipe special? It’s simple, affordable, and packed with bold flavors that appeal to both kids and adults. Plus, it’s a step up from my Tater Cake Recipe, offering a handheld meal with minimal cleanup. Whether you’re a kitchen newbie or a seasoned cook, this dish is your ticket to a quick, crowd-pleasing bite. Let’s dive in and get wrapping you’re going to adore this one!
Table of Contents
What Are Cheesy Garlic Chicken Wraps?
So, what exactly are Cheesy Garlic Chicken Wraps? At their core, they’re a delightful mashup of juicy chicken, melty cheese, and aromatic garlic, all bundled into a soft tortilla. Think of them as a portable version of comfort food with a twist easy to make and even easier to eat! I once jokingly called them “garlic hugs in a wrap” at a dinner party, and the name stuck because they’re just that cozy. Unlike the more complex Korean BBQ Meatballs, this recipe skips the fuss and delivers big taste in record time. Curious yet? Let’s explore why this dish will become your new go-to!
Why You’ll Love Cheesy Garlic Chicken Wraps
Here’s why these wraps will steal your heart:
- Quick and Easy: First, they’re ready in just 20 minutes perfect for those nights when time’s short but hunger’s big. The cheesy, garlicky goodness hits all the right spots without hours of prep.
- Budget-Friendly: Next, you won’t break the bank. With staples like chicken, cheese, and tortillas, you’re saving money compared to takeout, much like the cost-saving vibes of my Sandwich Roll Recipe.
- Flavor Packed: Finally, the combo of garlic, melted cheese, and tender chicken is irresistible. Add a sprinkle of herbs or a dollop of sour cream, and it’s a flavor explosion that rivals even the High Protein Pasta Recipe.
In short, these wraps are a tasty, wallet-friendly win that’ll have everyone asking for seconds. Ready to see how simple they are to make?
How to Make Cheesy Garlic Chicken Wraps
Quick Overview
This recipe is all about speed and satisfaction. In just a few steps, you’ll transform basic ingredients into a cheesy, garlicky masterpiece. The chicken stays juicy, the cheese melts perfectly, and the tortilla crisps up just right all in under 20 minutes. For another quick meal idea, check out How to Master the Southwest Egg Rolls Recipe in 5 Steps. Now, let’s get started!
Key Ingredients
Here’s what you’ll need to make 4 wraps:
- 1 lb boneless chicken breast, diced into bite-sized pieces
- 1 tbsp olive oil
- 2 cloves garlic, minced (or 1 tsp garlic powder for a shortcut)
- 1 tsp Italian seasoning
- Salt and pepper to taste
- 1 cup shredded cheddar cheese (or a mix with mozzarella for extra stretch)
- 4 large flour tortillas
- Optional: 2 tbsp sour cream or salsa for topping
Step-by-Step Instructions
- Cook the Chicken: First, heat olive oil in a large skillet over medium heat. Add diced chicken, season with salt, pepper, and Italian seasoning, and cook for 5-7 minutes until golden and cooked through.
- Add Garlic: Next, toss in the minced garlic and sauté for 1 minute until fragrant don’t let it burn, or it’ll turn bitter!
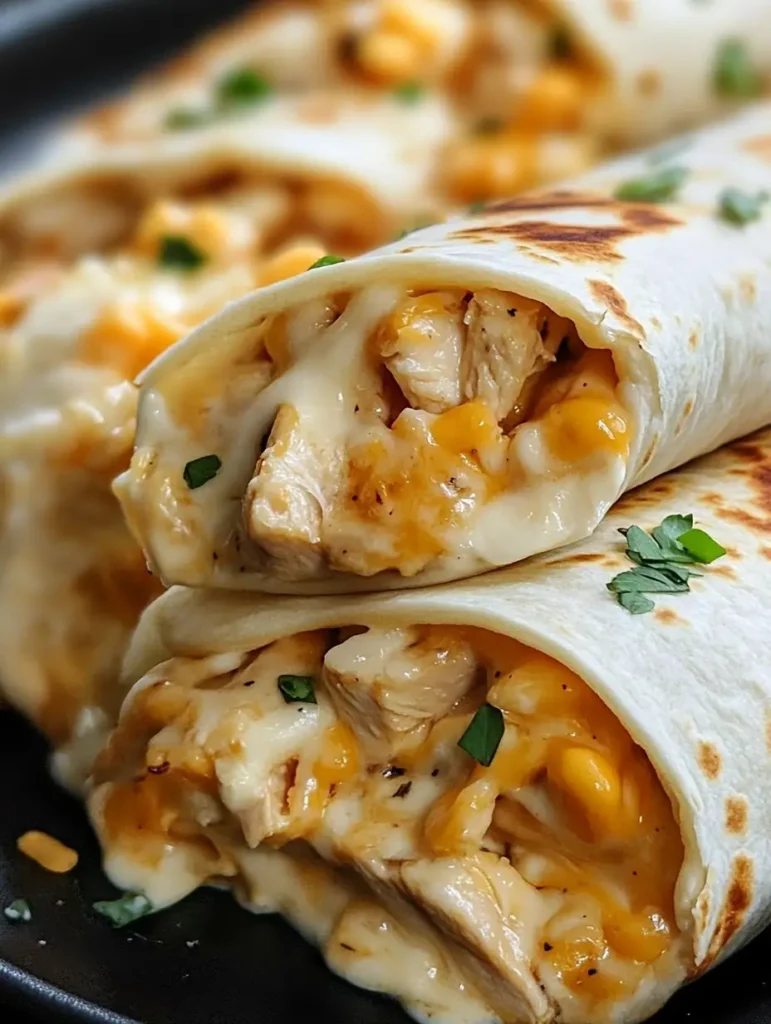
- Melt the Cheese: Then, sprinkle shredded cheese over the chicken in the skillet. Cover with a lid for 1-2 minutes until the cheese melts into gooey perfection.
- Assemble the Wraps: Meanwhile, warm your tortillas (microwave for 10 seconds or heat in a dry pan). Spoon the cheesy chicken mixture onto each tortilla, leaving space to fold.
- Fold and Crisp: Finally, fold the tortillas into wraps tuck the sides in, then roll tightly. For a crispy finish, place them seam-side down in the skillet for 1-2 minutes per side until golden.
That’s it! Your wraps are ready to enjoy hot, cheesy, and oh-so-satisfying.
What to Serve with Cheesy Garlic Chicken Wraps
These wraps shine on their own, but pairing them elevates the meal. For instance, serve with a side of Tuna Ceviche Recipe for a fresh, zesty contrast. Alternatively, a bowl of Hash Brown Potato Soup Recipe: A Comforting Delight adds cozy warmth. For a lighter option, try a crisp green salad with vinaigrette. Meanwhile, a cold drink like iced tea or lemonade balances the richness perfectly. Mix and match to suit your vibe!
Top Tips for Perfecting Cheesy Garlic Chicken Wraps
Want to nail this recipe every time? Here are some pro tips:
- Juicy Chicken: First, don’t overcook the chicken—check it’s at 165°F with a thermometer to keep it tender, much like tips in Mastering Beef Round Steak Recipes: A Complete Guide.
- Cheese Choices: Next, experiment with cheeses swap cheddar for pepper jack for a spicy kick or use mozzarella for extra stretch.
- Crisp Tortillas: Then, for that golden crunch, don’t skip the final skillet step. It’s a game-changer!
- Substitutions: If you’re out of fresh garlic, garlic powder works fine just use 1 tsp. For a lighter twist, try turkey instead of chicken.
- Avoid Soggy Wraps: Finally, don’t overload with wet toppings like salsa until serving to keep the tortilla crisp.
These tweaks make the recipe foolproof, whether you’re a beginner or a pro!
Storing and Reheating Tips
Got leftovers? Here’s how to keep them fresh:
- Refrigeration: First, store wraps in an airtight container in the fridge for up to 3 days. Keep toppings separate to avoid sogginess.
- Freezing: Next, wrap each cooled wrap in plastic wrap, then foil, and freeze for up to 2 months—perfect for meal prep like my Blueberry Bagel Recipe.
- Reheating: Finally, reheat in a skillet over medium heat for 2-3 minutes per side for that crisp texture. Alternatively, microwave for 1-2 minutes, but it won’t be as crunchy.
With these tips, your wraps stay delicious for round two!
There you have it Cheesy Garlic Chicken Wraps that are fast, tasty, and sure to impress! Whether you’re pairing them with a side from Tart Cherry Recipe: How to Make Jam in 3 Steps or enjoying them solo, they’re a winner. Give them a try tonight and let me know how they turn out I’d love to hear your feedback! Happy cooking!

Simple Example Sandwich
Equipment
- Knife
- Plate
Ingredients
Bread
- 2 slices bread
Fillings
- 1 tablespoon butter
- 2 slices ham
- 1 slice cheese
- 1 leaf lettuce
- 2 slices tomato
Instructions
- Spread butter on one side of each bread slice.
- Place ham, cheese, lettuce, and tomato on one slice.
- Top with the other slice, butter side down.
- Cut in half and serve.